Today I'm sharing the steps in making fun fabric yo-yos. No, not the wooden toys that come to mind when you hear the word yo-yo, but the poofy little round puffs of fabric that are sometimes used to make quilts.
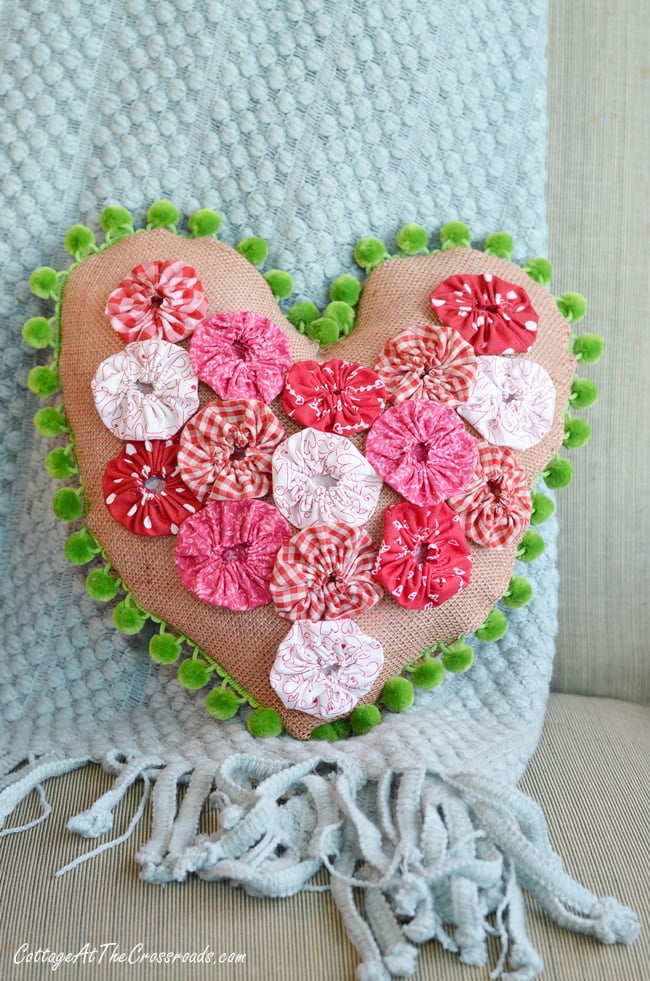
The ones that you see here in the photo of the heart shaped pillow that I made earlier this month. These fabric yo-yos are easy and fun to make, and you can use them to embellish almost anything.
Traditionally, they were used to make quilts in the United States during the Great Depression. Thrifty housewives would take clothing scraps to make coverlets for their beds. I happen to own one of those vintage yo-yo quilts, and I wish I could show you a photo of it. Right now it's in the booth that I have in our little town where I sell a few things. The shop is closed at the time so I can't get in to take a photo of it. But it is a beautiful thing.
Fabric yo-yos seem to be having a resurgence in popularity. If you search on Google or Pinterest, you'll find the most creative uses for them. You can embellish almost anything such as clothing, table runners, wreaths, dish towels, hair clips, etc. with those cute little fabric rounds.
I can see why they are popular because they are easy and quick to make and also portable so that you can work on them while waiting in the car pool line or at a doctor's office. Kids even think they're fun to make and what a great way to get them off social media and make them feel productive!
Materials needed to make fabric yo-yos
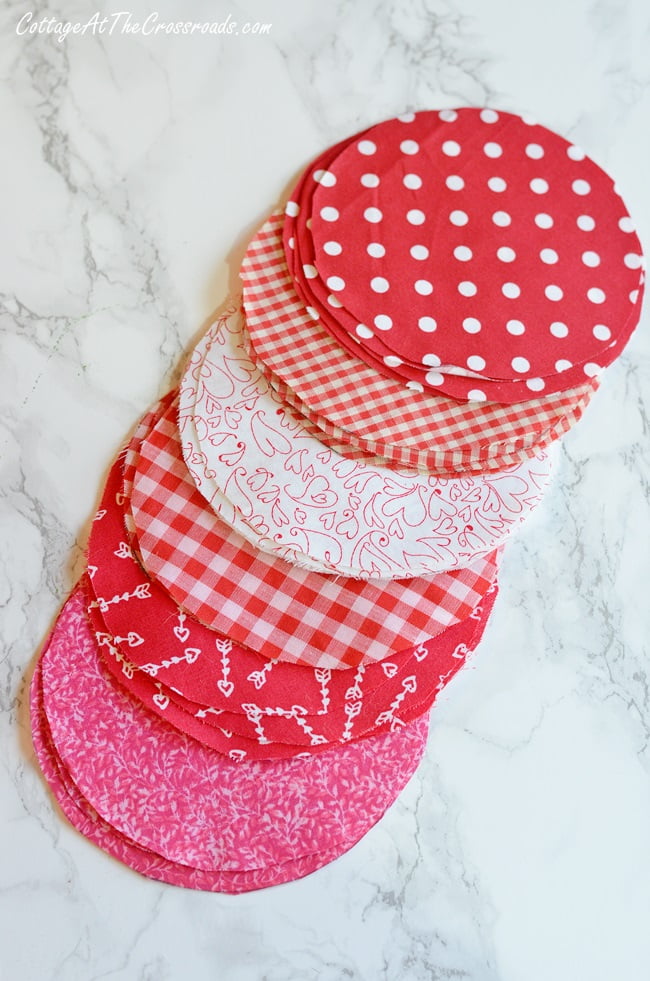
If you are going to make yo-yos, then you are going to need some circles of fabric. In the photo above, you can see the circles that I cut before I started making yo-yos to put on my heart shaped pillow. I used a variety of left-over fabrics as well as newly purchased "fat quarters." If you think that you're going to be making a lot of yo-yos, this (affiliate link) fabric bundle on Amazon is a great deal.
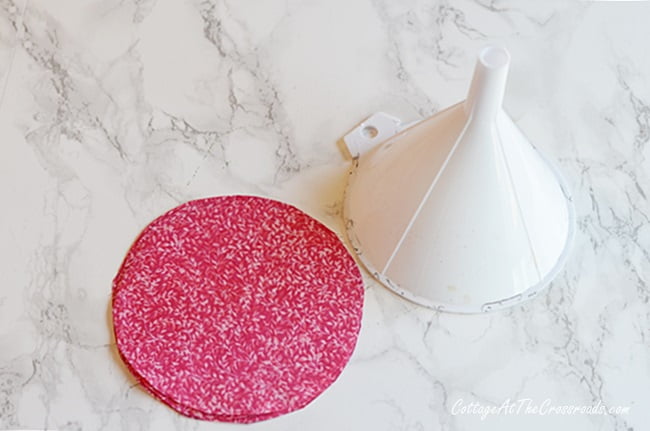
Cut circles that are twice the size of the finished yo-yo. I eyeballed this plastic funnel and it looked about the right size so I used it as my template. Its diameter is 5 ¼ inches and the diameter of my finished yo-yos is 2 ½ inches.
Iron out any wrinkles before you begin. I use Magic Sizing while ironing to give the fabric some body.
You will also need a needle and thread. Use some sturdy cotton thread that won't break when you start pulling your thread. I used white thread but you may want to use a color to blend with your fabric color.
And you'll need scissors, of course.
When you're ready to get started, thread your needle and knot the end of a single strand.
Traditional way of making yo-yos

Most people turn down the edge of the circle and use a running stitch all around the circle.

Then they pull the thread taut to create gathers without cutting the thread.

Using this method requires some pulling and pushing the gathers which is a little time consuming, I think. So I started making my gathers as I went along. Here is how I do it.
Steps in making fabric yo-yos
I had Leo take photos of me making a yo-yo so I could break down each step. (You gotta remember that I'm a retired schoolteacher! Just don't look at my old lady hands in these photos!)
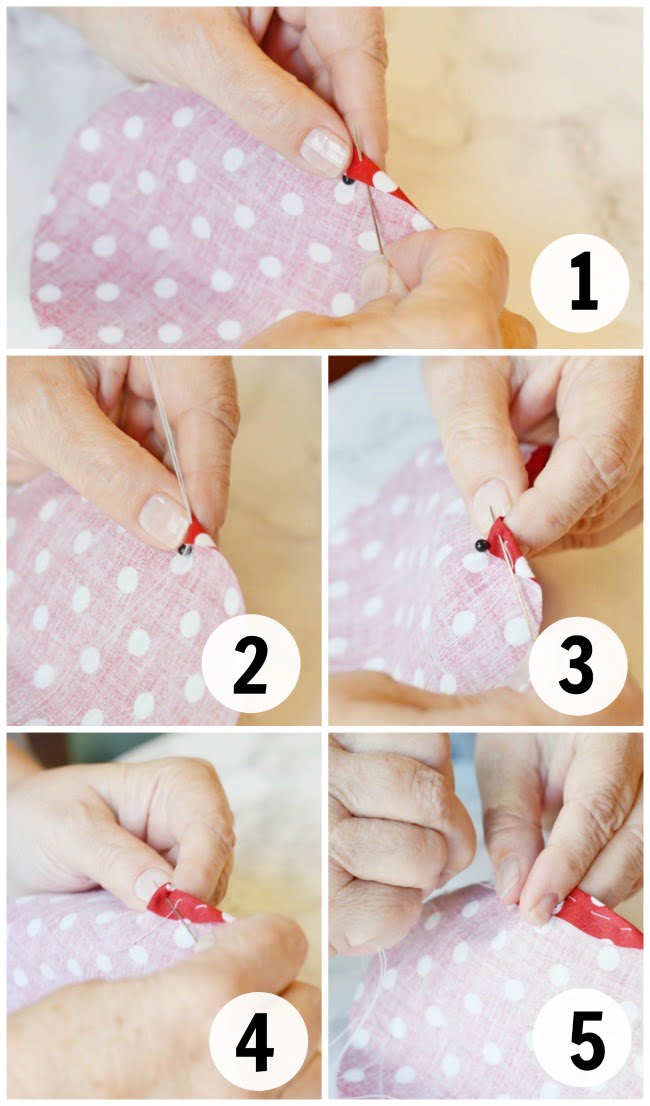
- Fold down the fabric about ¼ inch and secure with a pin. Bring up your needle from underneath the fold near the folded edge.
- Pull the thread all the way through the fabric.
- Insert the needle to make a running stitch near the folded edge.
- Remove the pin and make about 5 more evenly-spaced stitches. Large stitches work better because it makes ruffling easier.
- Hold the needle and thread in one hand while holding the circle in another.
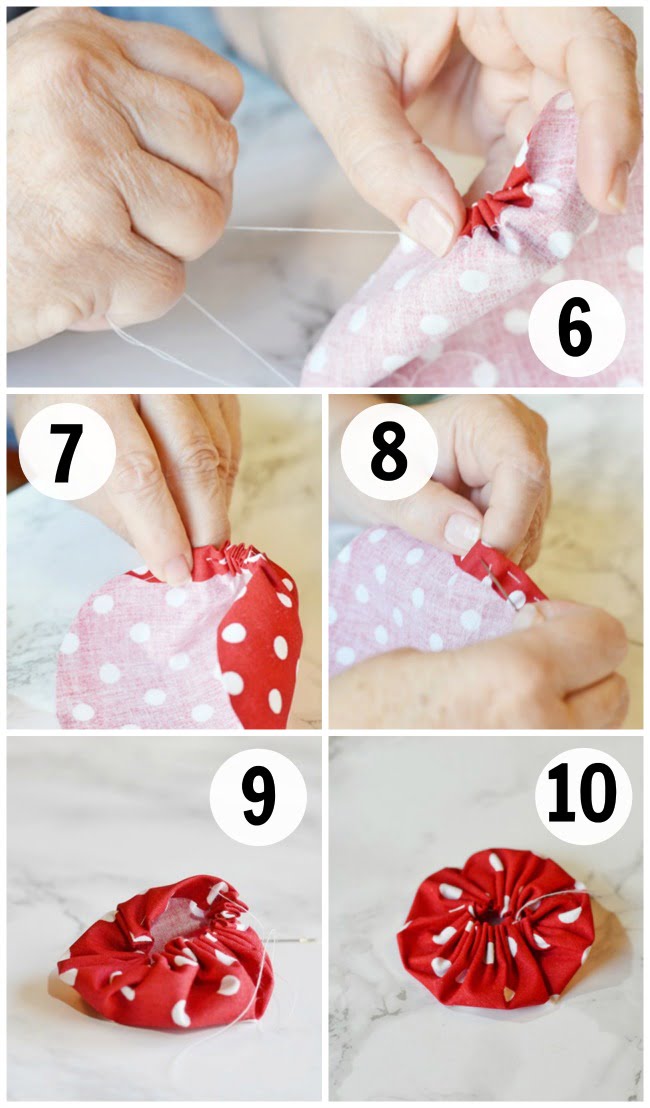
6. Gently pull the thread. (If you break your thread, you have to start over!)
7. Keep pulling until gathers are formed.
8. Make about 5 more running stitches and repeat the gathering process.
9. Continue this process until you have worked your way back to where you started, gathering as you go. End your stitching next to the starting point.
10. Pull your thread to make the last gathers. To hold the gathers in place, take several small stitches so that the gathers don't pull out and to secure the thread. Cut your thread and smooth out the circle.
Voila! You have made your first yo-yo! Once you get the hang of making these, you will find that you can make a finished yo-yo in about 2 minutes especially if you follow my steps and do the gathering as you go along rather than at the end.
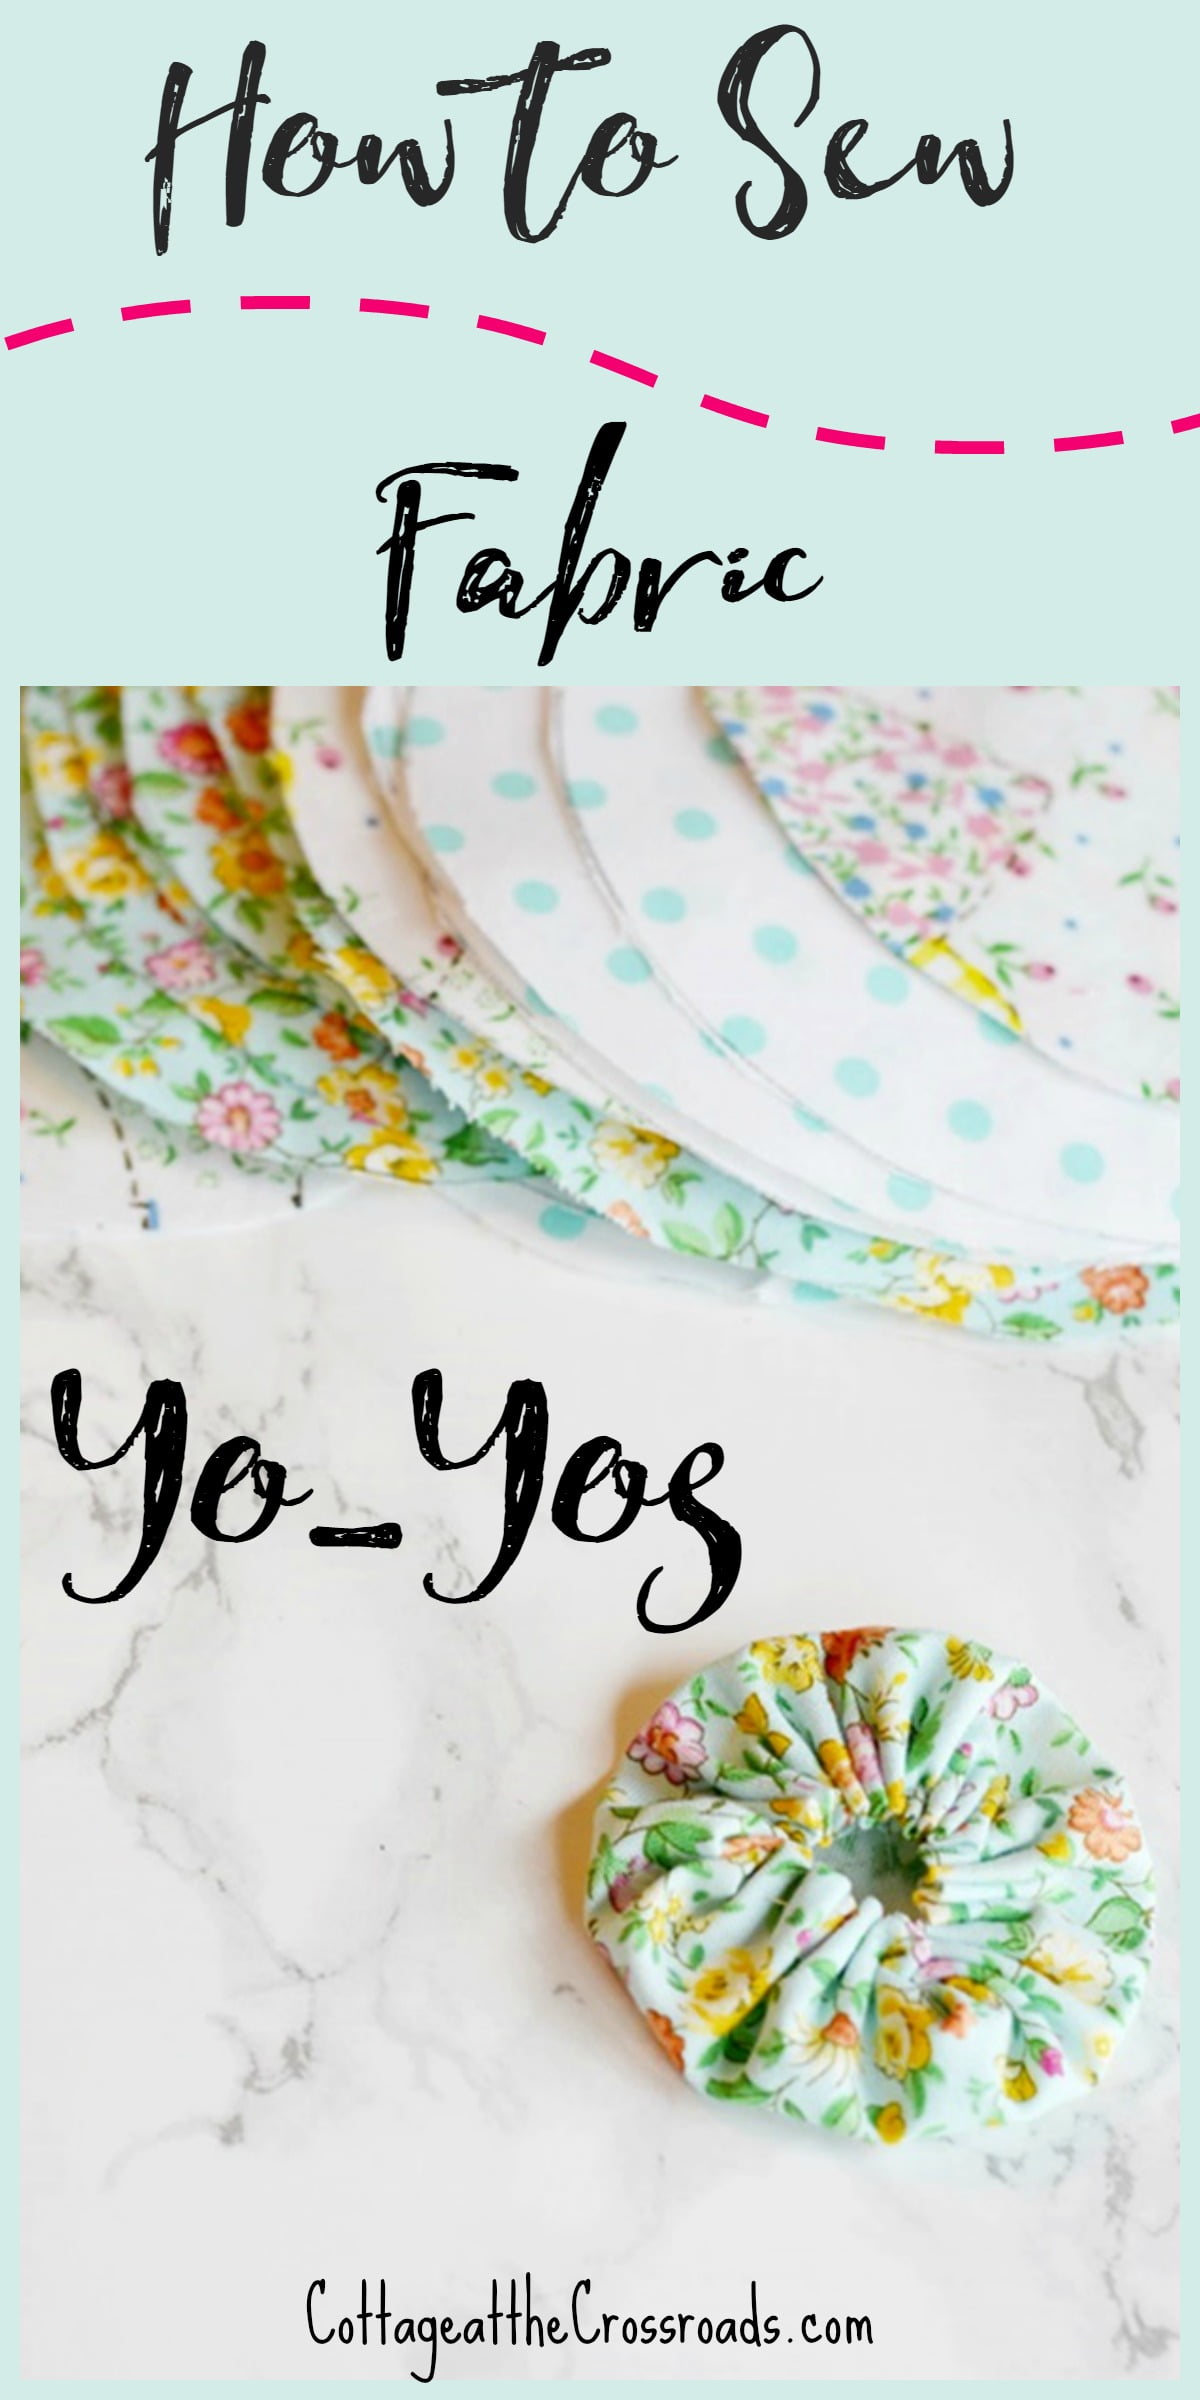
I already have another project lined up for using these adorable yo-yos, and you can see the colors that I'm working with in the above photo.
I hope you enjoyed this tutorial on how to make fabric yo-yos. If you're looking for more easy to sew projects, here are two of my most popular ones.


Janet
Thank you for this very easy lesson to follow. I can tel you’re a retired teacher! My great grandma had a bed spread made of yo-yos. I’m so happy to see them return, I’m now a great grandma and will be making my first yo yo today thanks to you.
Missy
When I was a little girl I had a clown doll made of yo-yos. A stack of them for each arm and leg and then there was a manufactured stuffed head with a plastic/celluloid face. I loved that thing. It was soft and squishy but would still sit up and could be posed for tea parties. Then it fell apart. My mom kept the pieces for a long time but now they have disappeared. I wonder if I could make one.... Thanks for the reminding me of that happy time.
Sandy
Great tutorial. Illustrated well. Thank you for sharing.
Stacey
I just love how those come together, Jane! Your schoolteacher instructions are perfect!
Dolly
I've always loved making the yo yo's. Yours look great!
Patti @ Pandora's Box
Many years ago I made a christmas garland made of yo-yos....makes me wonder what ever happened to it! lol Love the heart
Jane Windham
Oh, that's such a good idea, Patti! Garlands of yo-yos would be so cute on our porch! I don't think I can wait until Christmas!
Peggy Baker
the stitch would be better to double thread to prevent thread breakage....they are fun to make n can be used in many projects...
Jane Windham
I didn't have any problem with my single thread breaking but if it ever does, I'll switch over to using a double thread. Thanks for that tip!