Hi everyone! I'm back with the tutorial on how to create a topsy turvy galvanized bucket planter like I promised you!
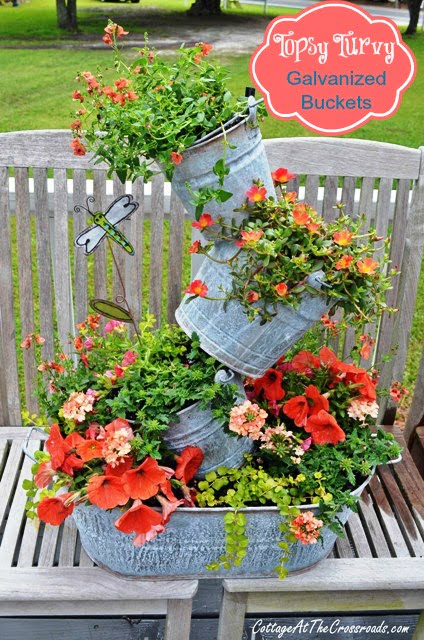
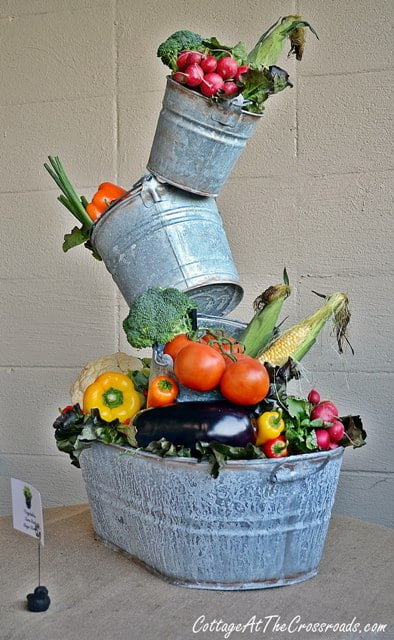
This planter was originally created to serve as a centerpiece for a recent party that I helped plan, but I knew that as soon as the party was over that I would be putting plants in it.
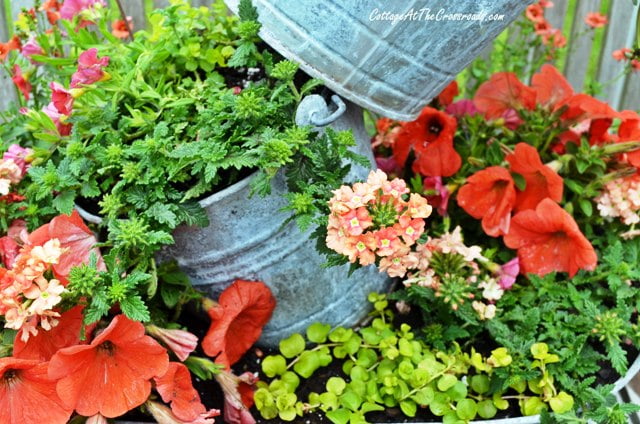
I had more fun choosing the plants because I happened to run across some pots at Lowe's with this mix of orange trailing petunias, orange calibrachoa, and peach verbena.
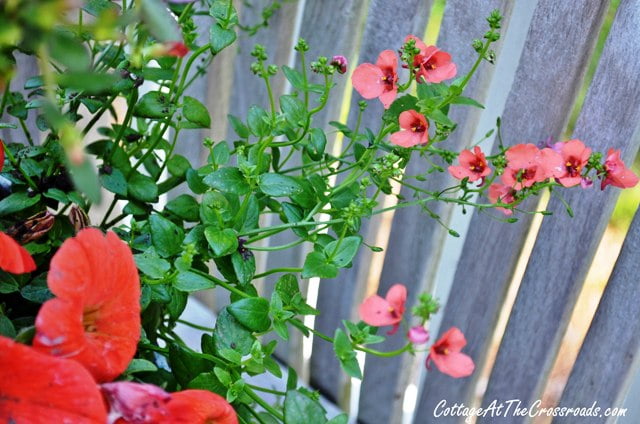
Just the day before, I had purchased two of these plants called flying colors in coral at our local garden center. I've always been partial to the color coral and wear it frequently. So when I spotted these, I bought them to go in some hanging baskets that I was making. But they ended up in my topsy turvy planter!
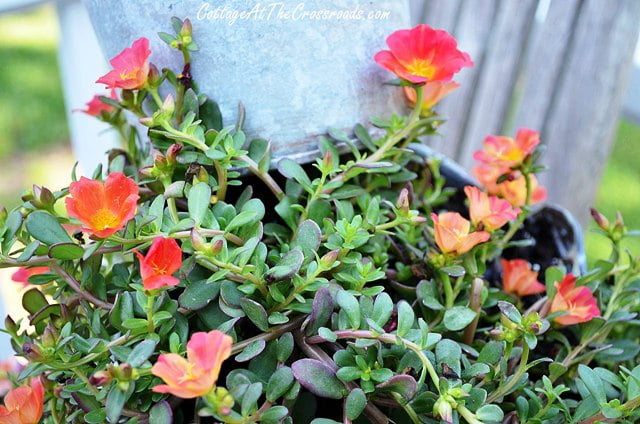
So once I settled on my color scheme, I came home with this purslane also.
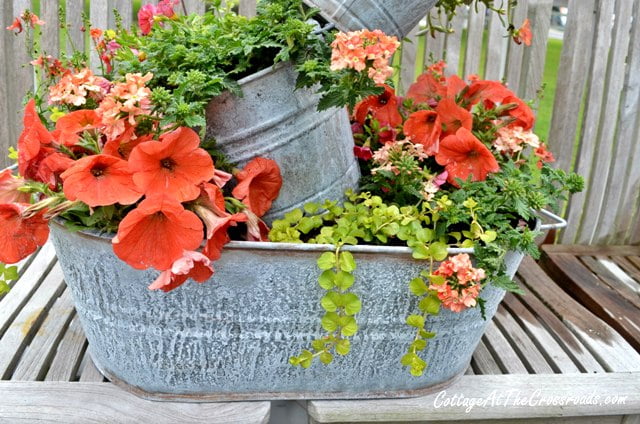
The little green plant spilling over is called creeping jenny and the label says that it needs part shade, but I have used it in full sun successfully as long as I keep it well-watered.
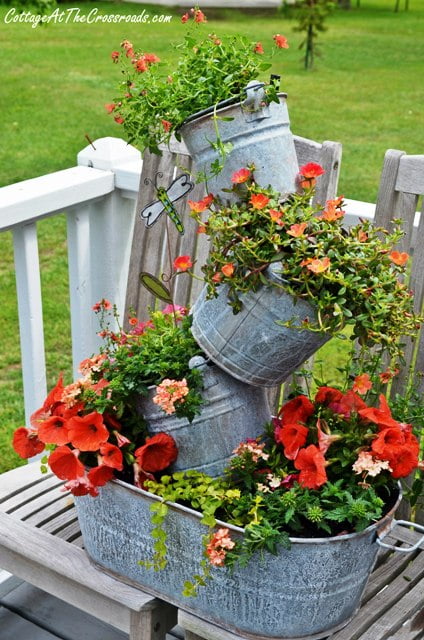
The color combination of all the orange and coral colors is so pleasing to me that I smile every time I pass by it.
So, here's a little tutorial on how we made the planter, just in case you'd like to make one, too.
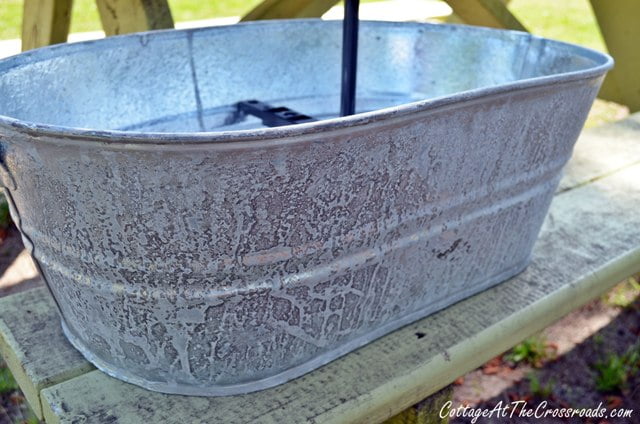
First you will need some galvanized buckets. If you happen to have some old ones around, that would be perfect. But I didn't have enough old ones so I purchased new ones at our local farm supply store. You can also purchase galbanized buckets online. The new ones are all bright and shiny, so you can knock back that shine by spraying the buckets with Clorox bleach and letting them dry in the sun. To construct the planter, I used a 3.7 gallon oval wash tub for the base, two gallon sized pails, and one 1.5 quart sized one, but you could use any sizes that you wish.
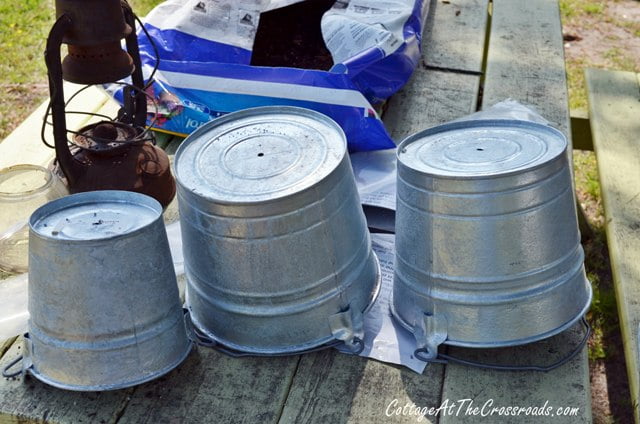
Here are the smaller pails.
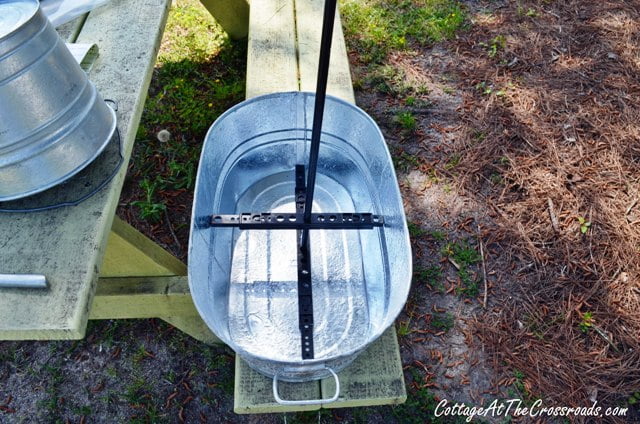
To put the pails together, you will need some sort of rod. Metal conduit pipe and rebar can be used, but we had already purchased this contraption at a garden show last fall.
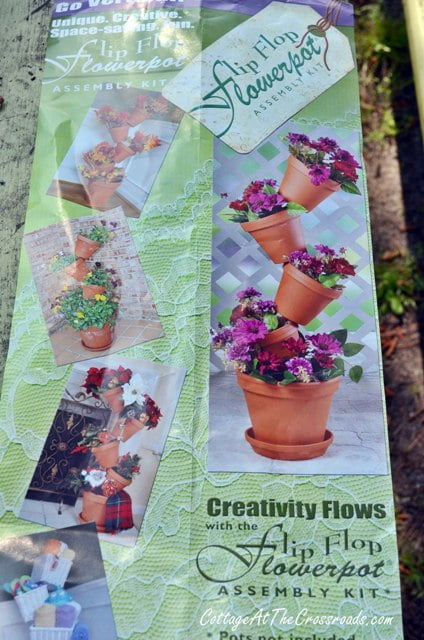
Even though we used this, I really would not recommend buying it. The rod is actually made of hard plastic and is flimsy. But, we went with what we already had and made it work.
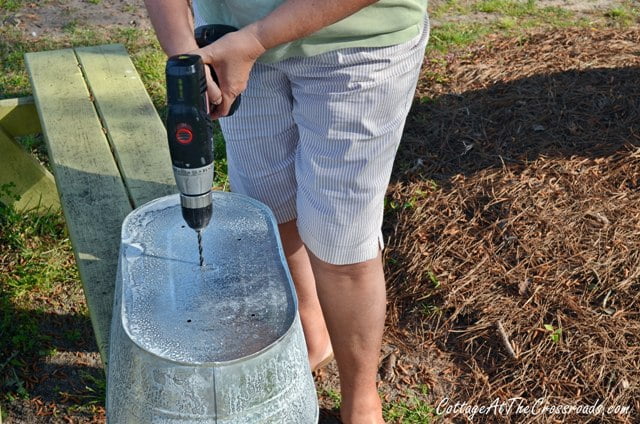
Put on your safety goggles and drill some small holes in your base and your other buckets for drainage. You will also need to drill a larger hole in each of the smaller buckets for the rod to pass through. Just make sure the hole is a little larger than the diameter of the pole because you need to be able to tilt them. If the hole is the same size as the pole, you won't be able to do that.
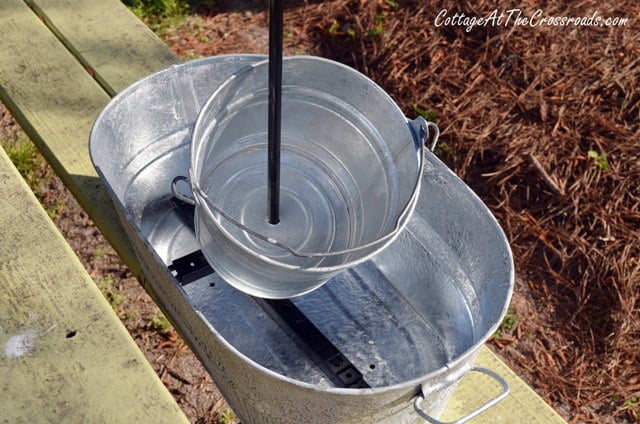
See what I mean?
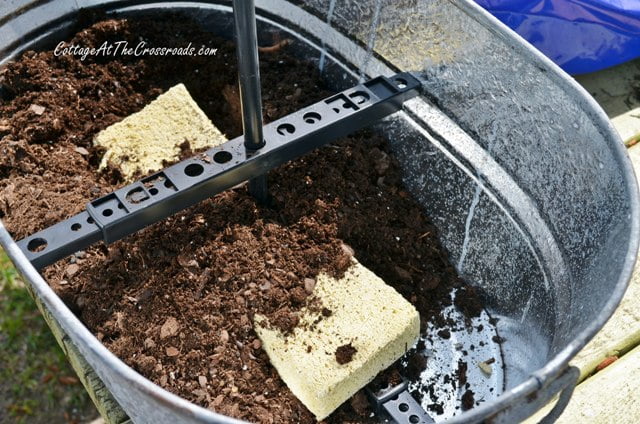
Once you get all your holes drilled, you're ready to add your potting mix. I also added two sponges because they help hold moisture in the soil. I thought by adding the soil and wetting it that it would make the pole more stable, but it didn't. So the next day, I took out all the soil and had Leo add a little concrete around the pole in the bottom. (We covered the drainage holes with paper cups so that the concrete would not cover them.) Worked like a charm, but if you are going to use rebar or conduit pipe, the best way to anchor your topsy turvy creation is to run the pipe through the bottom hole in your base and pound it into the ground about a foot. Then you won't have to worry about it tipping over in high winds!
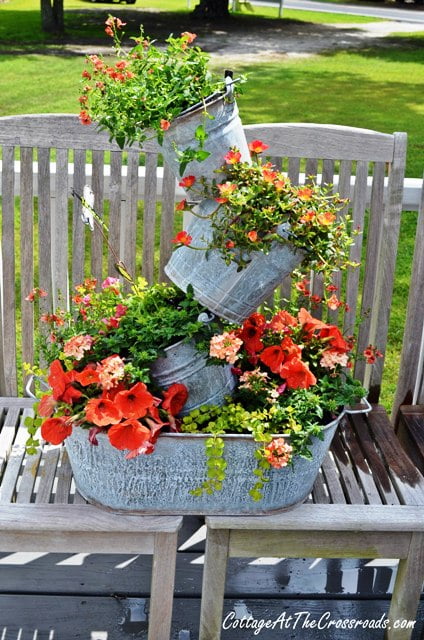
Ain't she pur-dy!
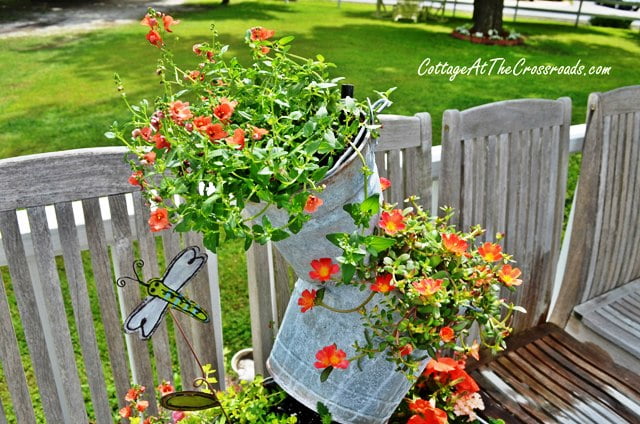
To finish off the planter, I stuck in the little flying insect stake that I recently found at Hobby Lobby. Can you see a little bit of the rod showing at the top? I can still add a small galvanized watering can or maybe even an old coffee pot!

Julie Briones
Hope you'll come by tomorrow and see our Pinterest Challenges that are inspired by your lovely creation, Jane! Pinned!
Lora Bloomquist
Sponge in the dirt..now there's a brilliant one I've never heard of! Thx!
sue
loved this. I had one for 2 years now. never thought of putting a sponge in the pots to help keep moisture in the soil. I had used rebar and have it anchored in the ground and it works very well. the rebar sticks up above my planters so I added a flag to it. I was able to tie it to the rebar.
Marilyn Gray
This is Absolutely Gorgeous! You are a genius! I love it...My favorite color is corals and oranges, also. I am going today to see if I can purchase the supplies for my yard. I can't hardly wait! Thank you so much for the tutorial!
BTW, I LOVE your choice of flowers, also! You must live in the south.
Lynne Blissett
I got my stacker at Better Garden Tools. They call it a Create A Garden. It is heavy metal and screwed together very fast. I used one in my bathroom with towels, washcloths and deco soaps. I just painted the pots! I have one on my back porch with tomatoes and two on my front porch for pansies when they come out. Now, I wish I had bought two more!!!
Vitor Hugo Scarparo da Costa
Genial esta grande ideia abraço.
Vitor
Luann
Very Cute and Easy 1,2,3, directions. Thank You!!
phyllis
jane, this is def. a 5 star project. you did a wonderful job; i would love to make this someday. i have orange in my yard also. you did great. thanks for sharing.
Phyllis
Kelly
Hi! I love this so much and since I have old buckets and coffee pots I'm going to do this! My only question is in your "cheap" pole system as you stated, it has a base piece down in the base pot. If I use rebar, do I need something too, or just a straight piece of rebar down through?
Thank you!
lynda w
I love this much better than the terracotta pot ones. I somehow can't get my pails to tilt
at the angle yours do. Any suggestions? Also do you have the name of the coral plant
you started with. I keep purslane to use as a flavoring for fish. It has a nice lemony
flavor and goes great mixed with a little lemon, purslane & mayo for fish instead of the
usual tartar sauce.
Deb W
Not sure if this will correct your pots to tilt more, but maybe the holes are too small. If they are just big enough for the pole to go through, it's keeping the "play" out of the pots, holding them too tight/close to the pole.
Susan M
This is beautiful, I love your colors and use of repurposing stuff laying around that is "not" garbage. It still has a purpose! I have post hole diggers minus the handle I don't know what to create with yet. I live in Fla so I may go with a bird of some kind, wish me luck & best of luck with your future endeavors.
Lori
Hey~!
I was wondering how much you paid for the pre-made planters...and also..if you were to make them and sell them..how much would you charge? I m planning on making some and selling them...and I thought $50.00 a piece wouldn't be too much..what do you think?
Thanks so much in advance~!
Lori
Lynne Blissett
Better Garden Tools sells them at flower shows for $25 each. I have 4 of them!!!!
Linda
Love, love, love the galvanized planter. I tried something similar with clay posts but it failed. Looked cute but the pots were too small the herbs dried out in the Missouri heat. Buckets might be jut the ticket. I cannot seem to find the tutorial that others have mentioned it. Where can I locate that ? This is the first snowfall of the season and already I am thinking about spring.
Joy @ Yesterfood
Jane, this is amazingly creative and beautiful- thank you so much for sharing! I had seen your canning tomatoes post on Facebook this morning....came over here and discovered YOU! 🙂
I'm your newest fan on Facebook, and am now following you on Google+ and Pinterest! 🙂
Love, Joy
Yesterfood
Sandy Dunlap
What a great idea! I couldn't find an oval pail so I ended up buying a round one. I also found a stake ( I think it's for a gate) the only downside to the stake was I had to put my buckets in all at once( there was a round ball on top) I put the bottom part of the stake in the ground, put my buckets through the stake and went on from there! I added 2 small pieces of wood to keep my first bucket stable. I have pics if you would like to see what I used! Just email me!
Judy
I think it is a marvelous idea-makes more room for lots of flowers in one space-now I can have even more flowers in my yard-like it better with the buckets than the terracotta pots-the flowers you picked out are wonderful. Thanks for the instructions.
doreen
Hi Jane
Visiting from your feature on another blog. I absolutely adore your topsy turvy planter! Can you come over here and make me one? If not, I will try to follow your wonderful tutorial.
Pinned your fantastic project.
Doreen
Jacki
This is beautiful! I love the touch of country. You had mentioned the flimsy plastic contraption you used. What about a thin tall old table or floor lamp made of metal??? Just take out the cord and unscrew from the base to inset into the pots and reattach base for stability? Just a thought.
Gina
I love this - thanks for the tutorial. Now, to find some galvanized buckets and I am so making this!
Erika Calitz
Really liked it.Thanks for step-by-step instructions. A project for me....greetings from Australia.
Clydia @ THREE MANGO SEEDS
I am so in ♥ with these! They would look fantastic on my back porch! xoxo
Cynthia
I am your newest follower. Can't wait to see more!
Cynthia
Cynthia
This is simply gorgeous, I found your blog from FB. Great tutorial. I hope you will pay me a visit at clochesandlavender.com
Cynthia
Robin~All Things Heart and Home
One of my favorite planters ever! Love the galvanized buckets and your choice of flowers!!!
xo
debra
This is so cute and your tutorial was great! My sisters husband made the flower pot one for her last year...I will have to show her this! 🙂
priscilla
Love this !!! So cute ! Thank you for the instructions !
Tammy
I think this has to be the most beautiful topsy turvy planter I have seen yet!!! I love the buckets and the colors go perfect! I would love it if you came by and shared it at One More Time Events. Hope to see you and your beautiful planter there.
Tammy
Nicki
I love that! Great job!
Miss Kitty
Wow! This is so darn cute! Thanks so much for sharing with us how you made it...even your trials and errors ...those are very helpful to know. I also love the tip about spraying the galvanized metal with Clorox to give it an aged look.
Marty Walden
Hi, Jane and Leo. You're one of my top three favorites in our first Home{work} Wednesday link party! http://www.martysmusings.net/2013/05/my-homework-wednesday-link-party-1-favorites.html
Suzy @ Worthing Court
How adorable. I just love this idea, Jane! Thank you for linking up to HW Wednesday.
errin lunt
Love this planter but i guess I don't understand how you keep the smaller pots from Falling down. It seems like once you put the dirt in they would just slide down into each other. Any tips. It really is so cute!
Jane Windham
Erin, that's a great question! The second pot rests upon the soil in the base pot, and once you put the 2nd pot on the post, the 3rd pot tilts on the edge of the 2nd pot, etc. So you have to fill your base pot with potting soil in order to get started. Thanks so much for the compliments! I've made another topsy turvy planter since this post!
Terry Thomas / Atlanta
What a great idea. But I would be worried about all that load (buckets, soil, plants & water) being held up by a plastic rig. Frankly I don't think it would last a season especially once wind starts to blow.
I was thinking of a simple yet inexpensive replacement for your vertical support and might have come up with something. Weights used for exercise and body building are round and have a hole in the middle where a steel bar can be inserted. And it seems every time I go to my local Goodwill Thrift Store there are always weights available for just a few dollars. (You can always find them new at Wal-Mart and sporting goods stores.)
Once you have the weight take it to a hardware store, Lowe's or Home Depot. Buy a pre-threaded pre-cut length of galvanized water pipe that fits the hole. (Don't use electrical conduit as it is too weak for this.) Or have them cut and thread galvanized water pipe to whatever length you need.
Then purchase a couple washers and nuts to secure the end of the pipe.
Now you have a vertical support that is very strong and will last for generations.
If you really wanted to get fancy you could actually run water up the pipe to a spray head. But that is another idea for another day. 🙂
Terry Thomas
Dunwoody Organic Gardens
Atlanta, Georgia USA
Mary from Virginia
I love your choice of colors for your pots! Thank you for the step by step tutorial! You make it seem easy. I must get some buckets!
Shirley@Housepitality Designs
I love, love this project...I hope that I can make one that would turn out half as good as yours!!...I loved it on the event table and so happy that you shared this with us!!...thanks Jane! It is so beautiful.
Ann
This is just so fun...I am loving the galvanized buckets too. I never knew how to make them look old! I think it will be a perfect planter year round too. Just picture it at Christmas!
Pam
That is about the cutest thing I've ever seen (besides my son)! Love the color combination of the flowers too. I'm going to have to run out to Tractor Supply and buy me some galvanized tubs now!
Kathleen
What a great project, Jane, they look wonderful!
Margaret Pereira
Jane I love your Topsy Turvy planter...great idea to use the galvanized buckets. Thanks for coming by my blog and commenting on my kitchen. I am looking forward to having a look around your posts. Heading over to your FB page and Pinterest as well.
Have a great day,
Margaret
Kelly @ Eclectically Vintage
It's so fun and whimsical Jane!! Thanks for sharing the how-to.
Kelly
Jean Windham
Great tutorial for the planters. The colors are my favorite too. Coral I have all through my condo but certainly do love the flowers you picked out for your planters. Great job and thanks for the tutorial also. Jean
Helen
Jane, I want one just like yours! You and Leo always have the nicest ideas to share. Thanks for your kindness!
Helen
JoAnn @ SweetPepperRose
Hi Jane! I think I like this better than the clay pots, at least they wouldn't break if bumped into, say, by the lawnmower 😉 Thanks for sharing your tutorial.
Diane
What a wonderful large scale version of the Topsy Turvy Planter, Jane. This project is on my "Bucket List" literally. Thanks for the tutorial!
Kerin
Cute, cute, cute!
Love your version !!
Smiles 🙂
K.
Tina
I love this!
Have a happy day 🙂
Carlene @ Organized Clutter
I love this. Fun and gorgeous!
woody windham
Jane, a friend of mine is a real handyman and I have forwarded this to him and ask him to make one for Jean, that's the original Jean Windham, because she has been raving about it ever since she visited Windham's Crossroads last week. I see where Leo played in the tournament after all. He must have changed his mind.
Dorothy Fritz
Thanks so much for sharing. Now I can have a beautiful display for my front and back yard!!
Joani
I love it and thanks for sharing the tutorial. I have several metals pans/pots/buckets I've picked up over the years and this would work well.
Peggy Neer
Fabulous. I have always loved the topsy turvey look but this really exceeds the basic design. Gotta go get some buckets. : )
debbiedoos
Oh my gosh Jane and Leo these are seriously the cutest ever! How cool. I am pinning these and hope they go wild:)
Mary
Jane this wonderful~ I'm so glad you posted this tutorial, I loved the veggie centerpiece and your coral and peach plants are beautiful! Thanks for the tip on de-shining new galvanized buckets too! I predict record pinning 🙂
Flo
I think this is so beautiful, will try one of my own and post a picture for you to see.